This blog post is part 3 in a series of blog posts.
- Part 1: How to pair AWS Cognito with Authsignal to rapidly implement passwordless login and MFA.
- Part 2: How to pair AWS Cognito with Authsignal to implement passkeys in a web app.
- Part 3: How to pair AWS Cognito with Authsignal to implement passkeys in a native mobile app.
In previous blog posts we outlined how to pair AWS Cognito with Authsignal to implement passwordless login and MFA and then how to expand this example to add passkeys. Both blog posts used a simple web app as an example.
This blog post will cover the integration steps required to add passkey sign-in to a native mobile app. The example app is built with React Native and uses the Authsignal React Native SDK but a similar approach can also be achieved using our iOS SDK, **Android SDK,** or Flutter SDK.

Full example code
You can find the full code example for using AWS Cognito with passkeys in a React Native app on Github. This example uses the Authsignal pre-built UI for email verification. You can also find an alternate version which uses the Authsignal Client API for email verification in this branch if you prefer a fully native UI.
Configuring passkeys for native mobile apps
In the previous example for a web app, we detailed how to enable passkeys as an authenticator in the Authsignal Portal. For a native mobile app, you will also need to follow some additional steps by setting up an associated domain and hosting an apple-app-site-association file (iOS) and an assetlinks.json file (Android) on your web domain. For example, if your web domain was simplify.io then you would need to host two files to prove that your app owns that domain:
- https://simplify.io/.well-known/apple-app-site-association (iOS)
- https://simplify.io/.well-known/assetlinks.json (Android)
This domain should match the value for the Relying Party that you configure in the Authsignal Portal.
The app code
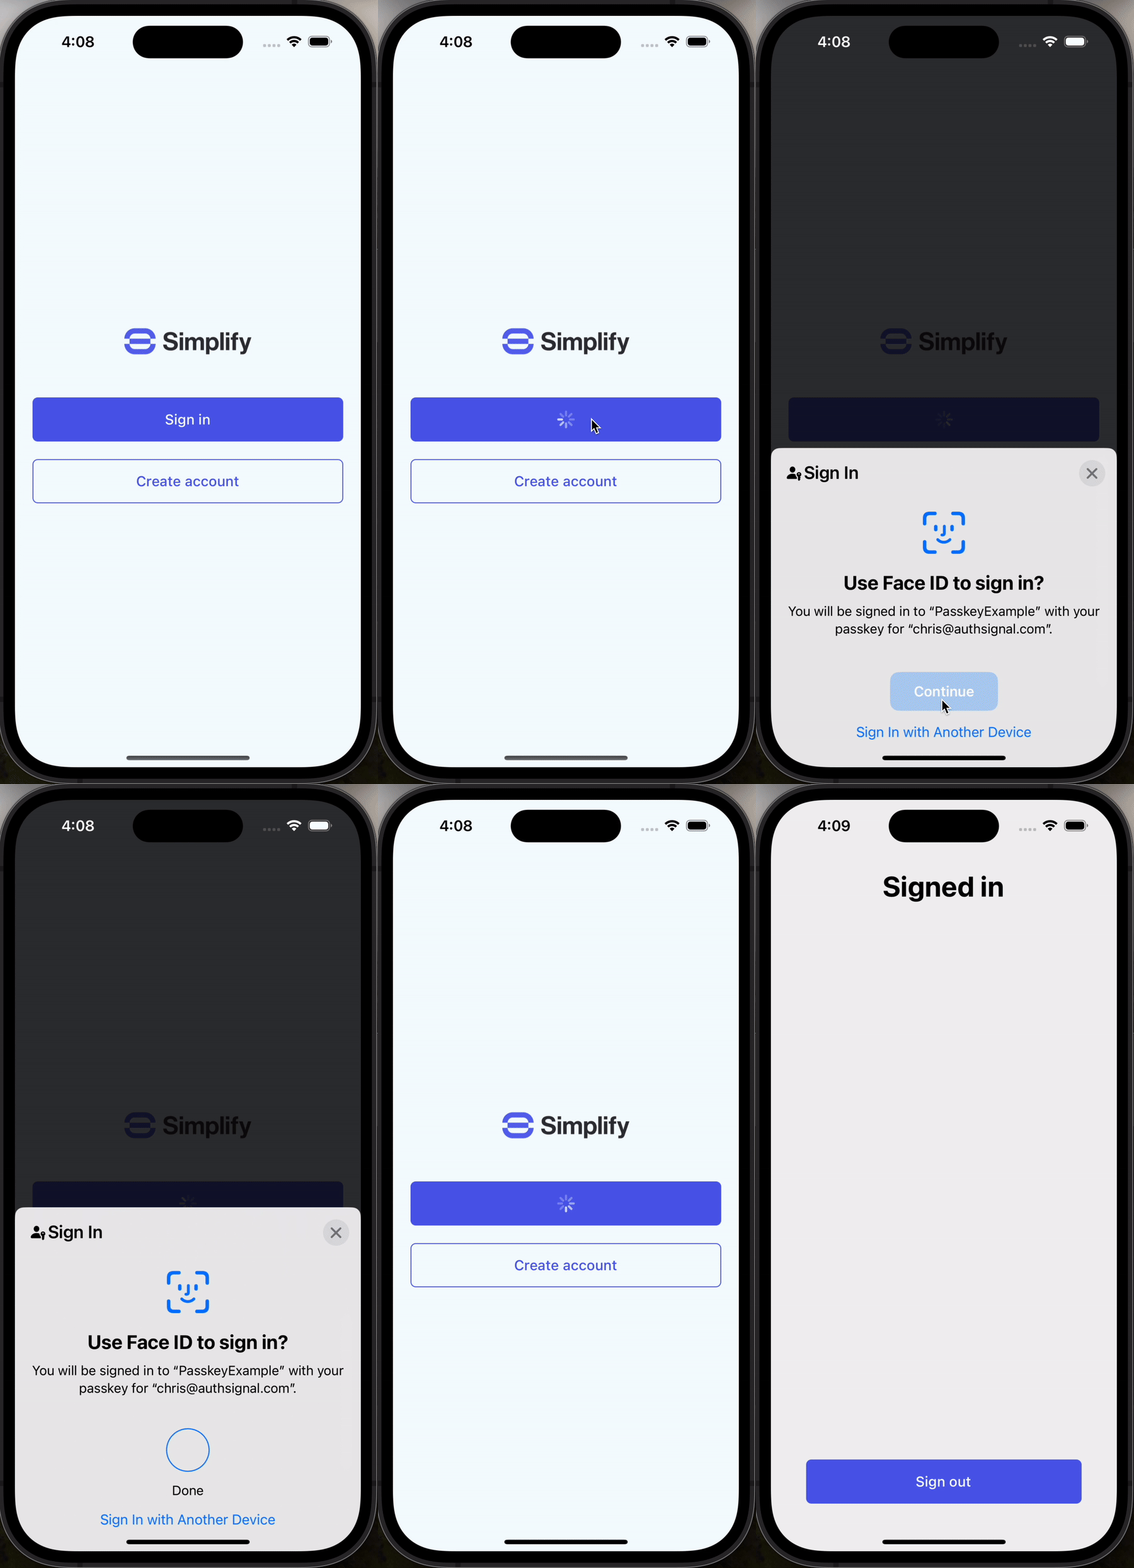
When the user presses the sign-in button, we will call the Authsignal SDK’s passkey.signIn method.
const { data } = await authsignal.passkey.signIn({
  action: "cognitoAuth",
});
This will display the passkeys available on the device and let the user authenticate with Face ID, then return the username associated with the passkey along with an Authsignal validation token. We then call the Amplify signIn and confirmSignIn methods one after another, passing the username and the validation token.
await signIn({
  username: data.userName,
  options: {
    authFlowType: "CUSTOM_WITHOUT_SRP",
  },
});

const { isSignedIn } = await confirmSignIn({
  challengeResponse: data.token,
});
A full example of the sign-in code can be viewed here.
Optimizing passkey UX
We have designed our app’s landing screen to just show a “Sign in” button and not initially require the user to input their email. This optimizes for the happy path where a user has a passkey available on their device. But it can also handle the scenario where a registered user doesn’t have a passkey available - for example, if they have deleted their existing passkey or if they’ve switched to a new device on a different platform where their existing passkey can’t be synced. In this case, we can check the errorCode returned by the Authsignal SDK.
const { data, errorCode } = await authsignal.passkey.signIn({
  action: "cognitoAuth",
});

if (
  errorCode === ErrorCode.passkeySignInCanceled ||
  errorCode === ErrorCode.noPasskeyCredentialAvailable
) {
  return navigation.navigate("SignInEmail");
}
If the user dismisses the passkey sign-in prompt or doesn’t have any passkeys available on their device, we can fall back to signing in with email OTP—either by launching the Authsignal pre-built UI and using ASWebAuthenticationSession (iOS) or Custom Tabs (Android) or by building our own native UI and using the Authsignal Client API.
Summary
In this final blog post in our series on pairing AWS Cognito with Authsignal, we’ve demonstrated how Authsignal’s mobile SDKs can be used to implement passkeys in a native mobile app. We’ve also shown how to design and build an optimal UX that puts the seamless passkey sign-in experience front and center while also accommodating scenarios where users may not have access to a passkey they’ve previously created.


.svg)


.png)


