.avif)
In a previous blog post we demonstrated how to enable MFA for Auth0 using Authsignal and outlined some of the benefits - for example, the ability to enable additional MFA factors without having to upgrade your Auth0 plan.
In this blog post, we will dive deeper into how you can fine-tune the MFA user experience with only some minor tweaks to your integration code.
Controlling the frequency of MFA challenges based on device
Once you’ve set up the basic integration to use Authsignal for your MFA journey, the default behavior will require users to complete an MFA challenge every time they sign in. Depending on how long your session is, this can add additional friction for users, and it is important to find the right balance between security and UX.
Configuring a rule
To help achieve this balance, you can configure a rule for your Auth0 login action in the Authsignal Portal based on the user’s device. If a user has successfully completed an MFA challenge within a previous time window - for example, within the last 24 hours, then you can set the outcome to ALLOW.
.avif)
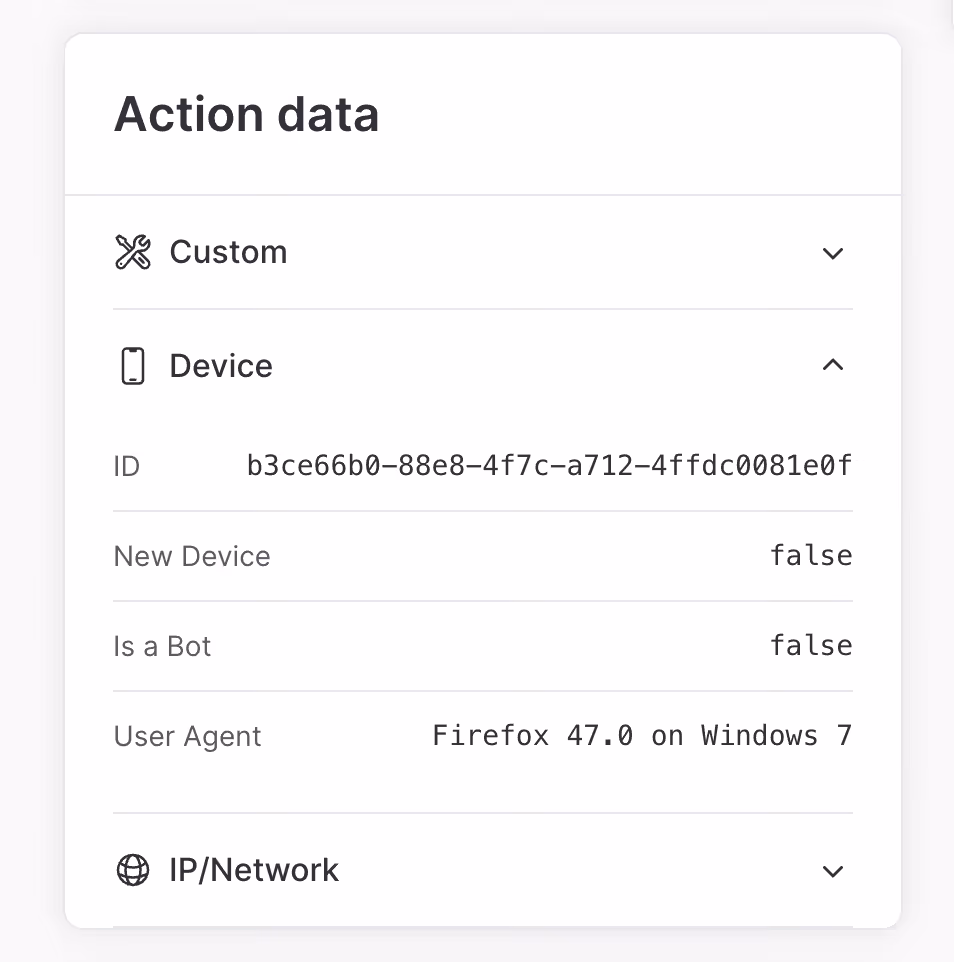
This means if a user’s device has already been authenticated within the previous day, the rule will be triggered, and the action’s default outcome of CHALLENGE will be overridden by an ALLOW outcome. As a result, the user will skip the MFA step after entering their username and password.
Sending a device ID
For this rule to take effect, you must also send a device ID to Authsignal so the user’s device can be consistently identified.
You may already have a persistent device ID value that your app is managing—for example, in local storage or in a cookie—in which case we recommend sending this value to Authsignal. On the other hand, if you’re not already tracking the user’s device, you can use the Authsignal Web SDK in your web app code, which exposes an anonymousId field for a persistent value stored in a cookie.
Once you have the device ID value available in your app, you can pass it through to Authsignal via your Auth0 integration code. This can be achieved by adding device_id as an **authorization param.**
What this looks like in practice depends on exactly which Auth0 library you use. For example, if using the auth0-spa-js library:
await loginWithRedirect({
  authorizationParams: { device_id: authsignal.anonymousId },
});
Or if using the auth0-react library:
<Auth0Provider...
  authorizationParams={{
    device_id: authsignal.anonymousId,
  }}>
  <Component {...pageProps} />
</Auth0Provider>
Or if using the nextjs-auth0 library:
await handleLogin(req, res, {
  authorizationParams: { device_id: authsignal.anonymousId },
});
Once you’ve successfully managed to pass a device ID via your Auth0 integration code, you’ll see it appear when viewing your Auth0 login actions in the Authsignal Portal.
Using your internal user ID
So far, we’ve examined how you can reduce consumer friction by controlling the rate at which users must complete an MFA challenge on the same device during login.
Another way to reduce friction while maintaining security is to challenge the user not at login but at another point when they’re further along in your app’s user journey. For example, this could occur when they’re viewing more sensitive data or when they’re making a more high-risk transaction. This kind of MFA is sometimes called “contextual MFA” or “transactional MFA,” and rules are often useful in controlling the exact conditions for triggering it.
It’s easy to integrate with Authsignal to add contextual MFA to any part of your app using our flexible integration model based on tracking actions. However, this also often means integrating in a context where your app is identifying users not by their Auth0 user ID but by your own internal user ID. And if you’re integrating with Authsignal from multiple integration touchpoints - as part of your Auth0 login flow but also outside this flow - then it’s essential to use a consistent user ID across all of them.
Fortunately, it’s simple to adapt your Auth0 integration to send Authsignal your internal user ID. This can be achieved by updating your Auth0 action code snippet:
const {
  handleAuth0ExecutePostLogin,
  handleAuth0ContinuePostLogin,
} = require("@authsignal/node");

exports.onExecutePostLogin = async (event, api) => {
  const userId = event.user.user_metadata["your_internal_user_id"];

  await handleAuth0ExecutePostLogin(event, api, { userId });
};

exports.onContinuePostLogin = async (event, api) => {
  const userId = event.user.user_metadata["your_internal_user_id"];

  await handleAuth0ContinuePostLogin(event, api, { userId });
};
Auth0 provides multiple different options for where you can store your internal user ID - for example, as app_metadata, or as user_metadata - but whichever option you choose, you can look up the value when handling the Auth0 action event and pass it through to the Authsignal Node SDK. The result will be that your users are consistently identified, whether they’re doing MFA on login or contextual MFA at a later point in your app’s user journey.
.svg)

.png)